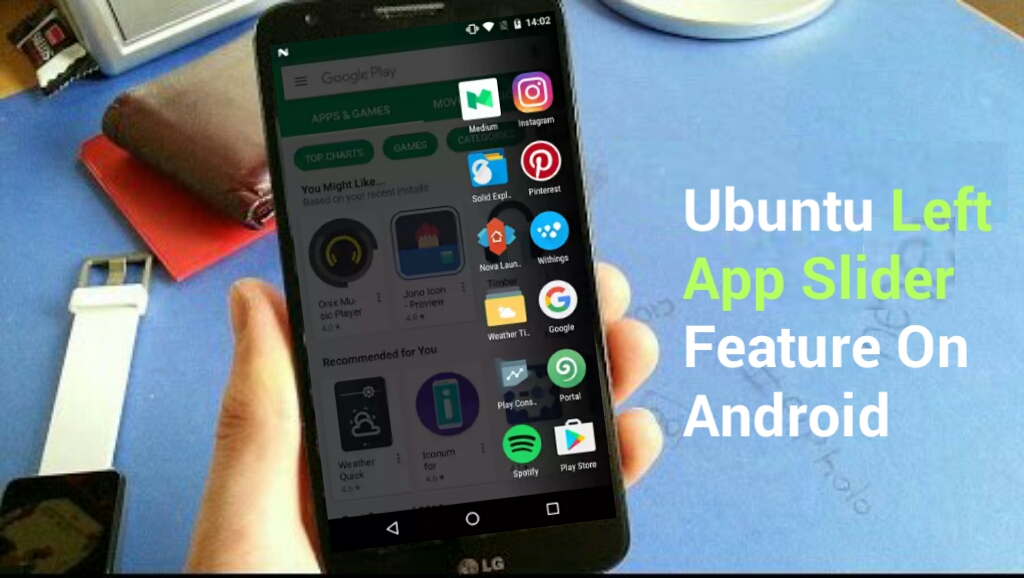
Get left app slider feature or Ubuntu gestures on your android device with Meteor which let’s you have access to your apps by swiping on the left edge of the screen.
Android ecosystem can actually be more intense once you start to journey deeper into it. Day after day, developers are striving there best to debut the essential apps that can help bring more advance features on our android device. While exploring the Google playstore, I stumbled upon an app termed meteor (formely known as Grovebox), which can bring the Ubuntu for phones features on your android device. One of the highlights of Ubuntu for phones is the app launcher that comes up with a simple swipe from the left edge of the screen, allowing you to quickly launch an app from anywhere in the OS.
Meteor main function is to aid in multitasking by creating a slider where you can access your favorite apps from the left of the screen. The app brings lot’s of essential features and has been optimized to work on all android device without rooting. Thus in this article we’re going to reveal the best way to bring the Ubuntu left app slider feature on your android device.
Bring Ubuntu Left App Slider Features On Android Using Meteor
First and foremost you’ve to navigate to the Google playstore and download Meteor. Once after the app download process is complete, it will auto install itself. Now locate the app from your device app drawer and fire it up.

On the first launch, you will be presented with some intros about the app. Simply skip them to open the app main interface. Meteor doesn’t offer much except the three options (Panel, Theme and Preference) that can be seen at the homepage.

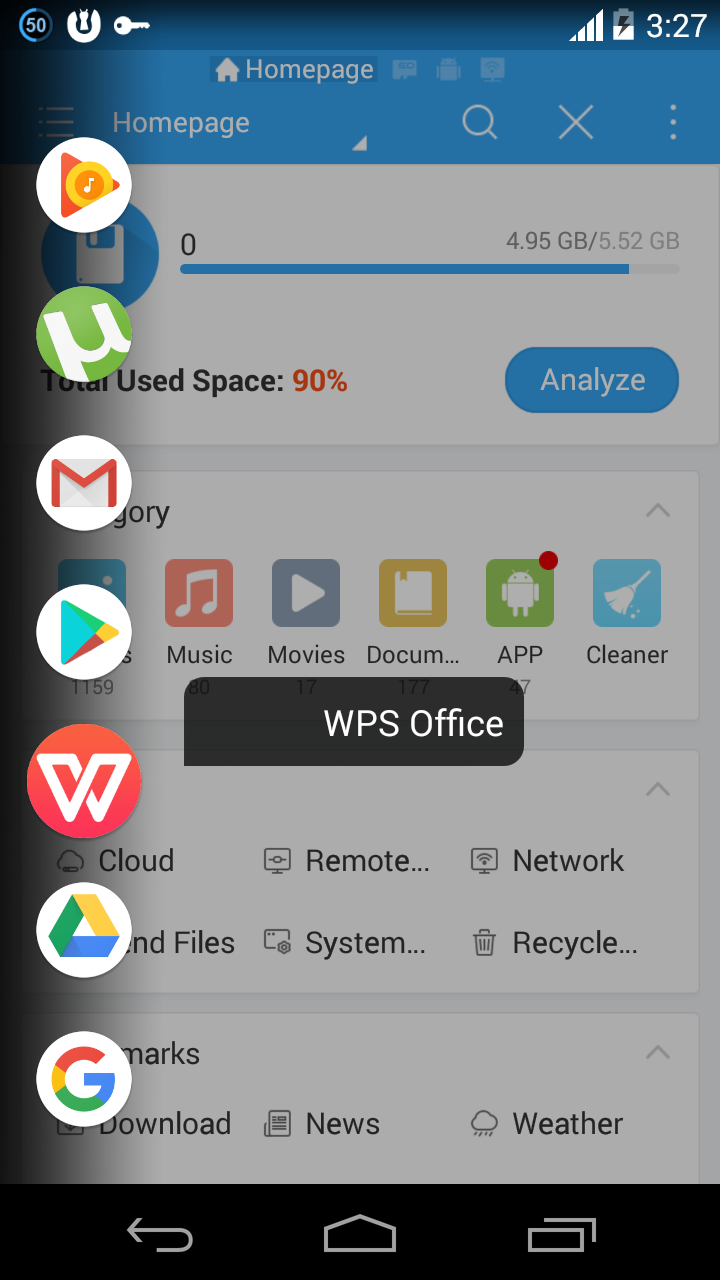
By default there’s only one Panel to select from, however once you upgrade to the Pro version of this app, you will get to enjoy more feature. Tap the “Pen” icon below the white box and select the apps you wish to access from the left side of the screen.

Next under “Theme”, notice the “Pen” icon below the first theme, hit on it and a pop up box will appear. Now select your desired color and also change it’s transparency to your preference. Once you’re through, hit the “Save” Button.

Now the Preference offers some tiny customization which you’d like to activate. Simply hover in there and activate some of the options you found worthy. You can also “Blacklist” app in other to pause meteor while using the blacklisted app.

Now once you’ve tinkered with all the options to your preference, simply toggle the “OFF” button. A pop-up will emerge asking you to grant meteor accessibility service in other not to conflict with other apps and also to enable the Blacklist feature to work perfectly.

Next tick the box and you will be redirected to another screen. Your job here is to find Meteor from the list and enable it. Once done hit “OK” on the pop up box that will appear. Then notice the “Settings” option below the screen, simply click on it to navigate back to the Meteor app.
Notice
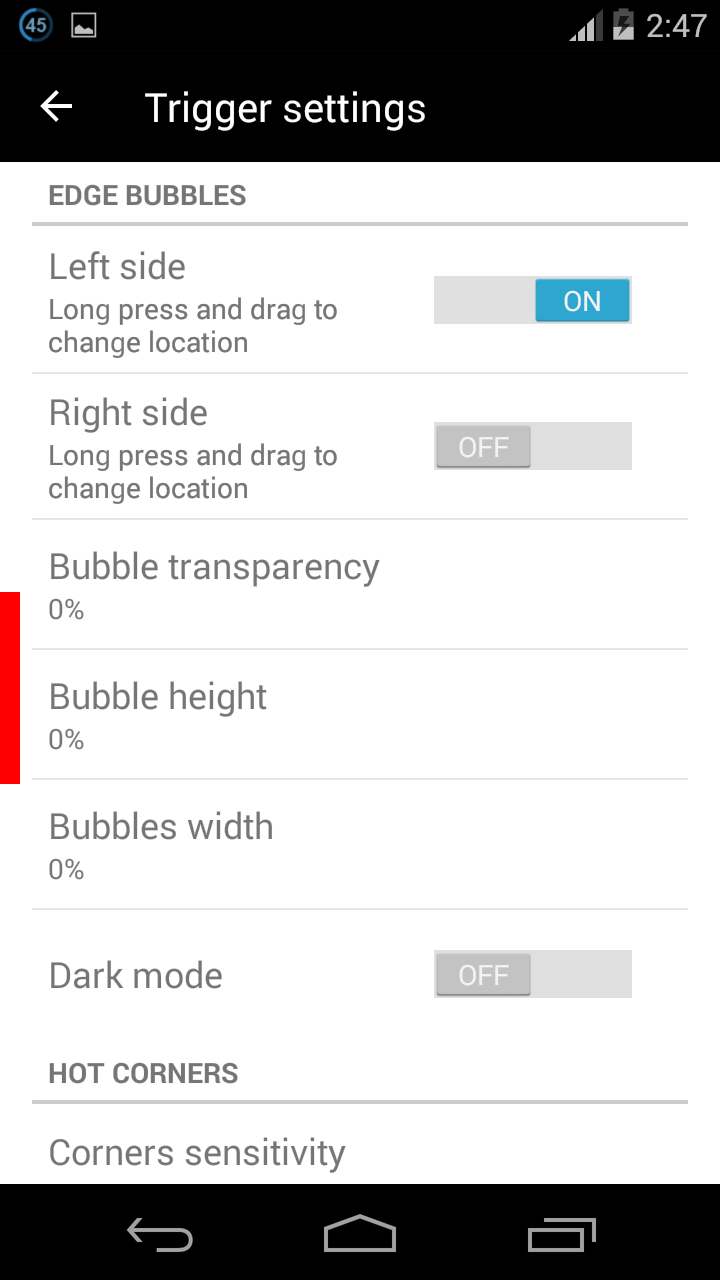
From the Preference options on Meteor app, jump into the “Trigger Settings” and tinker with some options. However make sure that you enable either of the first two options (Left Side or Right Side). In other to determine where exactly the slider will emerge. Apart from that, you can also set it to the “Hot Corners” if you prefer.
Final Words
One of the best feature Meteor brings is that you can also change your favorite app icon. Thus if you’ve some cool icon packs, then you’re probably good to ride. The paid version of the app ($3.99) gives you access to many new features such as the ability to assign more than 8 shortcuts to the launcher and quick access to widgets. Overall the app is simply the best and you can tinker with various options in the app Preference to get a better and classic customization.